Automatic gaging for gear precision
Premier Precision, Cornelius, NC, won a contract to produce precision gear blank pinions for one of the US Big Three automakers. First it purchased six new automatic Kummer Precision boring machines to run a "lights out" part producing program scheduled 24 hours a day, seven days a week. In the process of making the gear blanks from 5120 H modified steel a 12% scrap rate emerged.
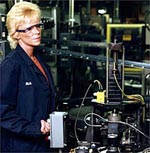
To combat the high scrap rate and associated inefficiencies, Edmunds Gages, Farmington, CT, built a series of automatic gaging systems specifically for the Premier Precision gear blank. The gages are self contained units which accept interchangeable dedicated part tooling, which allows Premier the flexibility to run different parts with minimal setup and downtime. A Computer Aided Gage (CAG) provides a CRT for the operator in diagnostic operations and signals to the part producing machines for "feedback".
Parts are presented to the gage lying with its side down, rolling down the gravity infeed track to the load area. Then the part triggers a fiber optic photo sensor initiating the automatic gaging cycle. The part is transferred into the gaging station and the transfer mechanism returns, signaling the next part of the cycle into action. Tooling then engages the part and a rotation mechanism advances, in turn rotating the part for checks. After a settle period, parts are measured and classified. Tooling and rotation mechanisms then retract to home positions and the transfer mechanism ejects the part from the gage station to be sorted.
All machine motions are pneumatically operated using air cylinders and air powered slides controlled by a GE Series One programmable controller and push-button station.
"Each gage measures the first process in the manufacture of the part, including OD, ID, overall thickness, squareness of bores to faces, and sortings at 4.5 seconds per part," explains Rick Ragan, Premier Precision quality assurance manager. "Rejected parts are automatically removed from the line before the next machining operation. The gages are considered post-process gages because they measure the part both outside the boring machine but before the next machining operation is performed on the part. With the part outside the machine, specific characteristics of the part are measured against the print specifications within an environment conducive to good measurement practices, rather than where chips and coolant are present in the machine tool. And although Premier's machines are CAM-driven, these gages have the capability to signal to CNC machine controls to make any offsets and adjustments automatically before the next part is produced. Sorting any reject parts at the individual process also eliminates adding additional machining costs to a part which is already scrap. The Edmunds Gages system measures 11 critical characteristics in 4.5 seconds. Premier Precision bought the gaging system "because we just could not afford rejects," explains Mr. Ragan. "After our gear blanks are put in dunnage and shipped directly to the automatic transmission assembly line in Ohio. That line has no incoming inspection. The blanks go directly to the gear hobs where they cut the teeth and then go on to assembly."
Quality assurance is critical for the product. If Premier Precision's automaker customer encounters one rejected part in a monthly shipment of 420,000 automatic transmission gear blanks, the entire load must be re-inspected, each and every part. "Automatic gaging has reduced our scrap rate to 0.25%, and lowered tooling costs," says Mr. Ragan. "We've also cut 48 hours from our weekly production time schedule producing the same amount of parts." To date, Premier Precision has shipped 24 million gear blank pinions without a single reject.
Reprinted from Quality in Manufacturing


A New Dimension In Precision Measurement
.
(860) 677-2813
Toll Free 877-521-5818