(Milwaukee -- Wisconsin) Harley-Davidson Motor Company's new motorcycle engine, the 1450 Twin Cam 88 is not just a rework of an older style. The exterior of the engine may look similar to other models - a 45-degree, air cooled V-Twin, push-rod engine - but the internal components make the difference. Over 95% of the new engine's internal parts are different from the previous model. A faster revving engine, sustained engine speeds of 5500 rpm, and longer engine life are the results.
When the Harley-Davidson engineers designed the new engine, they saw an opportunity to revamp the whole manufacturing process. Brad Banachowicz, Quality Control Manager for the company, describes the big picture. "A Quality initiative, the 2003 Program for Powertrain Operations, puts the focus on meeting the customer's needs by proactively preventing non-conformance. Instead of depending on inspectors or someone else down the line to catch the problems, we will start at the front of the line, and assure quality in each of the products and processes along the way. We are also partnering with suppliers and service providers who can actively help us."
HARLEY-DAVIDSON MEETS TIGHT TOLERANCES WITH AUTOMATIC GAGING
Reprinted from Quality in Manufacturing
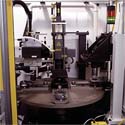
Harley-Davidson 1450 Twin Cam 88 engine connecting rods awaiting inspection prior to assembly. Gary Schaeffer, in Harley-Davidson's Flywheel Assembly area, positions connecting rods for inspection on the Edmunds gaging system.
For instance, after setting goals to tighten the tolerances on the bore size dimensions of the connecting rods for the flywheel assembly from five tenths to two and one half tenths, they knew they would need a better system for inspecting the parts. According to Gary Schaefer, Harley-Davidson's Flywheel Assembly Manufacturing Engineer, "Previously we used some hand-held air plug gages for inspection, but we needed a better method to check the dimensions, as well as roundness and straightness. We needed an automated system that would take multiple measurements, do the number crunching and give us the information on out-of-round conditions, taper, etc."
Looking for the "better mousetrap", they turned to their current supplier of gaging equipment, Edmunds Gages. Working closely with Harley-Davidson, Edmunds was able to supply a gaging system designed to meet the needs of the product and process.

Jack Gaughan of Edmunds Gages describes the system, "We built this connecting rod gaging system for Harley-Davidson Motor Company to help them automate their inspection process, and maximize productivity. The gage system consists of a free standing gage base with an air plug gage that takes four individual diameter readings from which it calculates ten different measurements of roundness and taper features. This is housed in a machine control cabinet with a PanelView controller and Edmunds MicroCAGª readout. The Edmunds MicroCAGtm control system allows the operator to view data, accept/reject status, parts totals and SPC graphs, charts and histograms on the fly. It can be programmed to measure several dimensions simultaneously, for automatic or manual sorting, classification or machine tool feedback. Date, shift, time and gaging functions are displayed in real time. Reports functions include parts counters, numerical data for each part and feature checked, and full SPC data."
Once the part is in position it is measured. The gaging system sorts the parts into one of two classes, or rejects those that are out of tolerance. The good parts are coded for geometry, size and Julian date by a laser marking system, then routed to one of two conveyors for assembly.
Connecting rods on the gaging system table. Four separate diameter readings will be taken, and ten different measurements will be calculated, to assure appropriate roundness and taper tolerances are maintained.
"Says Gary Schaefer, "Without the automatic gage someone would have to check parts manually. Since there are two similar, but different, rods they could easily be mixed up. Automatic gaging and coding eliminates this problem." With the new manufacturing process, the flywheel halves, crank pin and two connecting rods are manufactured and assembled into a flywheel assembly. These are automatically routed on to the crankshaft assembly which is finalized with a truing and balancing operation. All component assemblies feed to the engine assembly, the "heart" of the process.
"The entire process must run quickly and smoothly," explains Gary Schaefer. "The Edmunds gaging system has a cycle time of 15 seconds per part, including laser marking. This is a great cost savings over manual gaging. Since the gaged rods are clearly marked, we are eliminating misassembled bearings on the final engine test stand. In fact, since the gage has been installed, there have been zero connecting rod assembly mistakes.

Adds Brad Banachowicz, "The Edmunds system has been very reliable, and is very accurate. The system is robust enough to run all day in a shop environment, with minimal maintenance. The supplier has given us excellent support, too. The gaging system gives us the feedback we need to help us deliver the highest quality part."


A New Dimension In Precision Measurement
.
(860) 677-2813
Toll Free 877-521-5818